


The Cleaning and Preparation Process
Cleaning and preparing 55 gallon drums is a critical process for anyone who wants to reuse these containers safely and efficiently. One of the most important things to understand when working with drums is that they can hold a variety of hazardous materials that can be dangerous if not handled properly. Therefore, it is essential to ensure that these containers are thoroughly cleaned and inspected before using them for any purpose.
This article will provide you with a comprehensive guide on how to clean and prepare 55 gallon drums. It covers everything from the equipment and materials you need to the step-by-step instructions for both metal and plastic drums. Additionally, we will provide tips and techniques for removing labels and adhesive residue and inspecting drums for safety.
This article aims to help you gain a better understanding of the importance of proper drum cleaning and preparation to ensure safe handling and disposal of hazardous materials. Let's dive into the various aspects of the process!
Safety Precautions
When cleaning and preparing 55 gallon drums, safety should always come first. It is important to wear personal protective equipment (PPE) to prevent injuries and illnesses. The specific PPE needed will depend on the materials being used and the condition of the drums. At minimum, appropriate PPE includes gloves and safety glasses.
When working with metal drums, additional safety tips are necessary. Sharp edges and rust can cause cuts and tetanus infections. Care should be taken not to create sparks, which can ignite leftover residues or cause explosions. When working with plastic drums, it is important to avoid using heat sources that can cause melting or deformation.
Before beginning the cleaning and preparation process, it is important to inspect the drums for any potential hazards. Damaged or corroded drums should not be used and should be disposed of properly. By following safety precautions and using the appropriate PPE, you can ensure a safe and successful cleaning and preparation process.

Cleaning Metal Drums
When it comes to cleaning metal drums, there are several materials that you will need. These include a high-pressure washer, warm water, soap, scrub brushes, and safety glasses. Once you have gathered all of your materials, you can begin the cleaning process.
The first step in cleaning a metal drum is to rinse it out with warm water. This will help to loosen any dirt or debris that may be stuck to the inside of the drum. Next, you will want to add soap to the drum and use your scrub brushes to scrub the interior and exterior of the drum. It's important to use a non-abrasive soap to avoid damaging the drum's finish.
After you have scrubbed the drum thoroughly, you can use your high-pressure washer to rinse away any soap or debris that remains. Make sure to rinse the drum out thoroughly so that no soap residue is left behind.
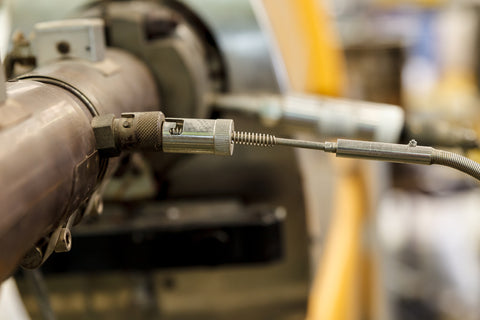
One common mistake that people make when cleaning metal drums is not removing the bungs. Bungs are the small, removable caps that are located on the top and bottom of the drum. They are there to allow for the insertion of pumps or hoses. It's important to remove these bungs before cleaning so that you can get into all of the nooks and crannies of the drum.
Cleaning metal drums is a straightforward process, but it's important to take your time and be thorough. By following the steps outlined above, you can ensure that your metal drums are clean and ready for use.
When it comes to cleaning plastic drums, the process is similar to cleaning metal drums, but there are some differences. Here are the materials you will need:
- Hot water
- Dish soap
- Scrub brush or sponge
- High-pressure washer (optional)
- Plastic polish (optional)
Here are the steps you should follow:
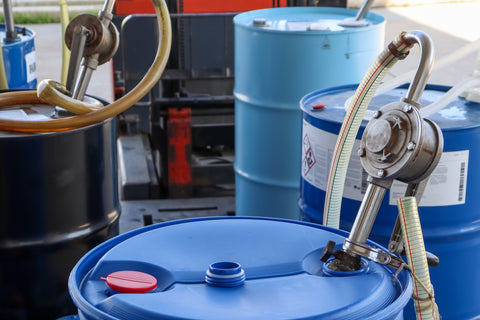
- Empty the drum completely and remove any remaining residue or debris.
- Fill the drum with hot water and several drops of dish soap.
- Use a scrub brush or sponge to clean the interior of the drum thoroughly.
- Rinse the drum with hot water until all the soap residue is gone.
- If necessary, use a high-pressure washer to get rid of stubborn dirt or residue.
- Allow the drum to dry completely before inspecting it.
It's important to avoid using harsh chemicals on plastic drums, as this can cause damage or warping. Some people also like to use plastic polish to give the drum a shiny finish and protect it from UV rays.
As with metal drums, there are some common mistakes to avoid when cleaning plastic drums. These include using abrasive materials that can scratch the surface, not rinsing the drum thoroughly, and using cleaning chemicals that are not recommended for use on plastic.
By following these steps and avoiding common mistakes, you can ensure that your plastic drums are thoroughly cleaned and ready for use.
Removing Labels and Residue
After the drums have been cleaned, the next step is to remove any labels or adhesive residue that may be left behind. This is important not only for aesthetics, but also for safety reasons as old labels can cause confusion and mistakes in handling or transporting the drums.
There are several techniques that can be used to remove labels and adhesive residue from metal and plastic drums. One of the most common methods is to use a heat gun or hair dryer to heat up the label and adhesive, and then gently peel off the label using a scraper or knife. Another method is to use a solvent such as rubbing alcohol or mineral spirits to dissolve the adhesive and then wipe it away with a cloth.

For stubborn labels or adhesive residue, there are alternative options that can be used. One option is to use a commercial adhesive remover, which can be found at most hardware or home improvement stores. Another option is to create a mixture of equal parts baking soda and cooking oil and apply it to the label or residue, letting it sit for a few minutes before wiping it away with a cloth.
It's important to note that when using any of these methods, care should be taken to avoid damaging the drum's surface or creating any sparks that could ignite any residue or fumes that may be present.
By removing labels and adhesive residue, the drums will be ready for their next use and will be labeled correctly and clearly, ensuring safe handling and transportation.
Inspecting Drums for Safety
Inspecting drums for safety is an important step in preparing them for use. Metal and plastic drums can become damaged or defective over time, and using a damaged drum can be dangerous. Here are some tips for inspecting drums for safety:
- Check for dents, cracks, or bulges on the exterior of the drum. These can indicate damage to the drum and may compromise its structural integrity.
- Inspect the interior of the drum for any signs of corrosion or rust. If the drum has been used to store corrosive materials, it may have developed leaks or weak spots.
- Look for signs of wear and tear on the drum's fittings and closures. These should be secure and not show signs of damage.
- Check the drum's markings for any indications of previous contents or warnings about the drum's suitability for reuse.
- Determine the suitability of the drum for your intended use by considering the materials it has contained in the past and any potential risks associated with those materials.
By taking the time to inspect drums for safety, you can ensure that they are suitable for use and minimize the risk of accidents or spills. It is important to only use drums that have been inspected and deemed safe for your intended use.

Ensuring Safety and Efficiency in Cleaning and Preparing 55-Gallon Drums
In conclusion, 55 gallon drums are essential for storage and transportation of various materials. However, it is important to clean and prepare them properly to ensure safety and efficient use. This article has highlighted the safety precautions to consider when handling these drums, step-by-step procedures for cleaning metal and plastic drums, and techniques for removing labels and residue. Additionally, we have discussed the importance of inspecting the drums for safety and tips on determining their suitability for your intended use. By following these guidelines and taking the necessary safety measures, you can effectively clean and prepare 55 gallon drums for optimal use. Stay safe and handle with care!